Upgrading Trailer Wiring for LED Light Compatibility
Introduction
Upgrading your trailer's lighting system to LED is one of the smartest improvements you can make. LEDs offer brighter light output, enhanced energy efficiency, and a longer lifespan compared to traditional incandescent bulbs. But here’s the catch: simply swapping out bulbs doesn’t always cut it. Your trailer’s existing wiring may not be capable of supporting the unique electrical needs of LEDs. If you want your LED upgrade to work properly, safely, and reliably, a wiring upgrade is often necessary. In this blog post, we’ll guide you through everything you need to know about rewiring your trailer for LED compatibility, including why it's essential, what materials to use, and how to do it right from start to finish.

Why Upgrade to LED Lights?
LED (Light Emitting Diode) technology provides multiple advantages over traditional lighting:
- Brighter output enhances visibility in all conditions, improving safety for you and others
- Lower power consumption reduces electrical load on the tow vehicle, leaving more room for other systems
- Instant illumination gives you a faster brake light response, which can prevent rear-end collisions
- Longer lifespan means fewer replacements, saving you time and money in the long run
- Shock resistance makes LEDs better suited for bumpy roads and off-road use
- Cooler operation reduces the risk of heat damage to lenses or wiring
While these benefits make LEDs ideal, they require a compatible infrastructure to function correctly. That’s where wiring upgrades come in.
Understanding the Compatibility Issues
Trailer wiring systems originally designed for incandescent bulbs can struggle when used with LEDs. Some of the key compatibility issues include:
- Lower current draw: LEDs draw far less power, which can confuse older vehicle systems that expect a higher load. This can result in hyper-flashing or bulb-out warnings.
- Voltage sensitivity: LEDs are more sensitive to voltage drops. Even minor corrosion or undersized wires can lead to flickering or dimming.
- Polarity sensitivity: Unlike incandescent bulbs, LEDs are polarity-specific. Reversed wiring will prevent them from working altogether.
-
PWM signal incompatibility: Some vehicles use Pulse Width Modulation (PWM) to control lighting, which may require special adapters to work with LEDs.
Addressing these issues means taking a thorough look at your current setup and preparing to replace or supplement components as needed.

Assessing Your Existing Wiring
Before installing any new components, it’s critical to evaluate your trailer’s current electrical system:
- Look for wire damage or corrosion
- Test ground points for solid contact
- Check wire thickness—thinner wires may not cut it
- Make sure plugs match between trailer and vehicle
- Note any repairs or splices that could fail
-
Test the lights using a multimeter or tester
If your inspection turns up multiple issues, a full rewire might be more efficient and cost-effective than piecemeal repairs.
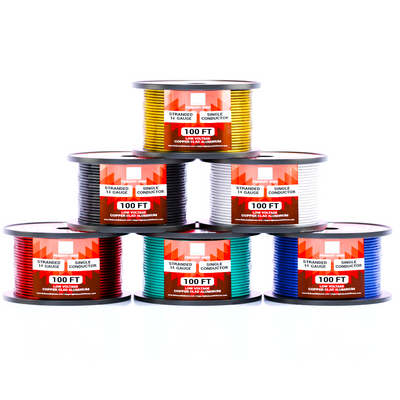
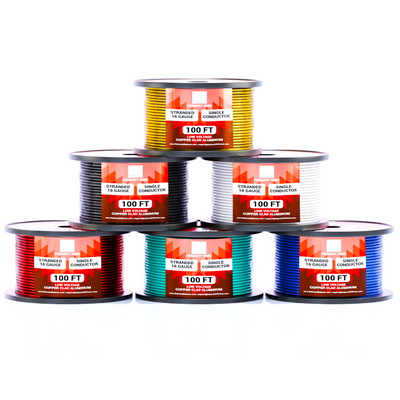
Choosing the Right Wire
Quality wiring is the backbone of a successful LED lighting upgrade. Here’s what to look for:
- Thick enough—14 GA minimum; 12 GA for longer trailers
- Made of high-grade Copper or Copper Clad Aluminum (CCA)
- Well insulated against weather and wear
-
Color-coded to industry standards for easier work
Using proper wire upfront helps reduce maintenance and prevent future electrical issues.

Rewiring Steps for LED Compatibility
Rewiring your trailer for LED compatibility may seem daunting, but the process becomes manageable with a structured approach:
- Remove old wiring: Cut out all old, brittle, or corroded wires. Don’t reuse compromised sections.
- Design your layout: Sketch a wiring diagram showing wire routes, junctions, and component placements.
- Run new wires: Route the wires cleanly along the trailer frame. Use split loom or conduit to shield from rocks, debris, and road spray.
- Install LED lights: Ensure lights are mounted securely and oriented correctly. Confirm they match your voltage (typically 12V).
- Upgrade grounding: Run individual ground wires to each light instead of relying on the frame. Secure them to clean, bare metal using star washers and anti-corrosion paste.
- Install a converter box if needed: If your vehicle uses a separate turn and brake circuit (5-wire) and your trailer is 4-wire, a converter is essential.
- Seal connections: Use waterproof heat-shrink butt connectors and apply dielectric grease to all terminals
- Test all functions: Use a test light or trailer tester to verify operation of running lights, brake lights, turn signals, and reverse lights (if equipped)
-
Secure wiring: Zip-tie wires every 12-18 inches and keep them away from moving parts or heat sources

Extra Tips for a Reliable Setup
- Carry a wiring diagram in your glove box or trailer toolbox for easy troubleshooting
- Label your wires using shrink tubing or weatherproof tags
- Keep a small repair kit with fuses, connectors, and spare LED bulbs
- Install a junction box for cleaner and more serviceable connections
- Use inline fuses near the power source to protect circuits from overload
- Perform seasonal inspections to check for damage, wear, or moisture buildup
Proper planning and execution now can save you hours of frustration down the line. Experiment with our Expert Software Tools to get customized wiring insights.

Conclusion
Upgrading to LED trailer lighting is more than a tech upgrade—it’s a safety investment. LEDs offer unmatched performance, but only if supported by a wiring system that meets their needs. Taking the time to inspect, plan, and install quality wiring ensures a smooth, long-lasting result. From choosing the right wire gauge and material to implementing smart grounding and protective measures, every step contributes to safer, more dependable trailer lighting.
Whether you’re towing a small utility trailer or a large hauler, Baboom Baboom’s high-grade CCA wire is a cost-effective, durable choice that ensures compatibility and long-term reliability. Don’t let outdated wiring ruin the benefits of your LED lights—upgrade smart, and enjoy safer travels ahead.