How to Build a Budget-Friendly Sound Pressure Level Setup
Introduction
Creating an SPL (Sound Pressure Level) setup that turns heads doesn’t require a fortune—just the right know-how, efficient components, and strategic planning. With the right blend of research, hands-on work, and budget-friendly solutions, you can build a system that competes with the big players without burning through your savings. This guide is designed to show you exactly how to make that happen. From choosing components that punch above their price to optimizing your wiring layout, each section delivers practical tips that stretch every dollar for maximum decibels.

Planning Your SPL Goals and Budget
Start by defining what success means for your SPL system. Do you want to break the 140 dB barrier for local meets or aim for the 150+ dB range in more intense competitions? Your target SPL will influence your entire setup, including the power requirements, box volume, and number of subwoofers.
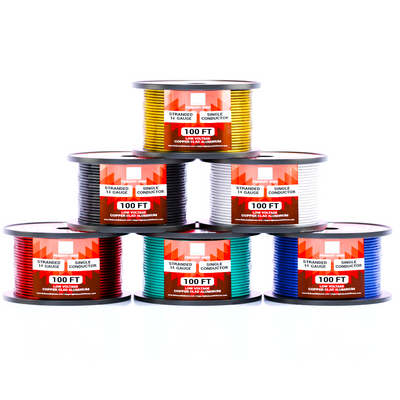
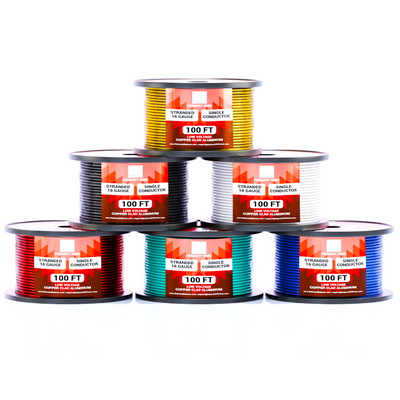
Once you’ve established a clear performance target, determine your financial limits. Break your budget into categories and prioritize based on SPL impact. Typically, most of your funds should go toward high-output subwoofers and an efficient enclosure. After that, allocate money for amplifiers, wiring, and electrical upgrades. Avoid fancy head units or flashy cosmetics unless you’ve already nailed the performance essentials. For affordable and high-performance wiring, our CCA wires are engineered to support powerful builds at budget-friendly prices.

Choosing Cost-Effective Subwoofers and Enclosures
Your subs are the foundation of your setup. Look for budget-friendly brands that offer great performance at lower prices—many lesser-known brands deliver surprising results. Choose subwoofers with dual voice coils (DVC), which provide greater flexibility when it comes to wiring configurations and impedance matching.
Enclosures can make or break your system’s output. A poorly tuned box will limit your SPL no matter how powerful your gear is. Build a ported enclosure tailored to your subs' recommended specs. Use MDF board for construction, and consider following detailed plans from reputable car audio communities or calculators. You can save hundreds by building it yourself and still outperform prefab enclosures. A proper port design alone can net you a 3-6 dB gain—essentially doubling your perceived volume without touching your amp.

Power on a Budget: Amplifiers and Electrical Support
You don’t need a thousand-dollar amp to get loud—you need the right amp for your system. Focus on Class D monoblock amplifiers with solid power ratings, thermal protection, and good efficiency. Brands like Skar Audio, Taramps, SoundQubed, and NVX are known for balancing price with performance.
A proper amplifier is only part of the equation. Power delivery is critical. Upgrade your alternator if your budget allows, or at minimum, install the Big 3 upgrade (alternator to battery, battery to chassis, and engine to chassis grounds). Doing this with thick-gauge CCA wire keeps your voltage stable under heavy load, allowing your amp to perform better.
Don’t forget your batteries—start with a healthy AGM battery, and consider adding a second one if you plan to run high RMS loads. Need help visualizing your setup or configuring your wiring runs? Use our free Expert Software Tool for tailored diagrams and guidance.

Smart Installation: Maximize Output with Clean Wiring
A clean and thoughtful install can give you more output than upgrading gear. Use thick-gauge CCA power wire to reduce voltage drop. Keep all your grounds short and connected to solid, sanded metal points. Isolate your signal cables from power lines to prevent interference.
Cable management not only helps performance but also protects your components. Secure your wiring to avoid vibration damage. Use ferrules or ring terminals to ensure tight connections. When setting gain levels, use a multimeter or an oscilloscope app to prevent clipping. This protects your subs and ensures clean, distortion-free bass.
For stealthy installs and examples of tight wiring paths, don’t miss our detailed Stealth Audio Setup guide, which includes step-by-step installation tips from the field.
Test, Tune, and Iterate
Tuning your setup is an ongoing process. Once everything’s installed, grab a decibel meter or SPL app to measure your system. Try different enclosure placements (sub up/port back, sub back/port side, etc.) and adjust your port tuning if you’re handy with enclosure mods.
Join online SPL communities to share your build and pick up tips from others. Budget SPL builders often share hacks like port blockers, baffle modifications, or cabin reinforcement tricks to gain volume without spending more. Record your results, track your dB increases, and make incremental changes until you hit your goal.
If you’re planning future upgrades or bulk purchases, consider visiting our Wholesale Page to save even more on CCA wiring.

Conclusion
You don’t need deep pockets to build a chest-pounding SPL setup. A well-researched plan, strategic upgrades, and hands-on effort can yield results that rival high-end systems. By focusing on subwoofer performance, enclosure design, efficient amplification, and clean wiring, you’ll get the most sound for your dollar.
At Baboom Baboom, we’re proud to support your SPL journey with high-quality CCA wiring solutions that don’t break the bank. Whether you’re entering your first competition or refining your daily demo setup, our About Us page shares how we help audio enthusiasts make it happen.
Need support? Questions about your setup? Drop us a message on our Contact Us and we’ll help you get louder, cleaner, and more efficient.