Fixing Common Trailer Wiring Fuse Failures
Introduction
If your trailer wiring keeps blowing fuses, it can be frustrating and even dangerous. Electrical issues in a trailer can cause brake lights, turn signals, and other essential functions to fail, leading to potential accidents and road safety violations. Understanding why your fuses keep blowing is crucial to diagnosing and fixing the problem efficiently.
In this guide, we’ll explore the most common causes of blown trailer fuses and provide step-by-step troubleshooting tips to help you resolve the issue.

Common Causes of Blown Trailer Fuses
1. Short Circuits in the Wiring
A short circuit occurs when a live wire touches a grounded surface, creating an excessive flow of electricity that blows the fuse. This can happen due to:
- Exposed or frayed wires
- Wires pinched in the trailer frame
- Moisture or corrosion causing unintended connections
Solution: Inspect the wiring harness for damage, replace any exposed or frayed wires, and use electrical tape or heat-shrink tubing to protect connections. A multimeter can help pinpoint where the short is occurring.
2. Overloaded Circuits
Using wires that are too thin for the electrical load can cause excessive current draw, leading to blown fuses. Trailer lights, electric brakes, and accessories require specific wire gauges to function properly.
Solution: Check the amp rating of your fuse and compare it with the power requirements of your trailer. Use a wiring gauge chart to ensure your wires can handle the necessary amperage. For instance, if your trailer's lighting system requires 10 amps, a 16-gauge wire may not be sufficient, and you might need to upgrade to a thicker wire.
3. Faulty Trailer Light or Connector
A defective trailer light or corroded connector can cause a short circuit, leading to blown fuses. Trailer lights are exposed to moisture and debris, which can degrade the internal wiring.
Solution: Unplug the trailer and inspect each light for moisture, broken filaments, or corrosion. Clean connectors with electrical contact cleaner and replace any faulty lights. If water damage is a recurring issue, consider upgrading to sealed LED lights.

4. Incorrect Wiring or Poor Grounding
If your trailer was recently rewired or modified, incorrect wiring connections could be the culprit. A poor ground connection can also cause electrical components to draw too much current.
Solution: Verify that all wires are correctly connected according to the trailer wiring diagram. Ensure the ground wire is properly attached to a clean, bare metal surface. Many trailer wiring issues stem from inadequate grounding, so make sure all ground points are solidly connected.
5. Damaged or Worn-Out Connectors
Trailer connectors frequently get exposed to road grime, moisture, and physical wear, leading to corrosion and internal shorts.
Solution: Inspect the trailer plug and socket for rust, bent pins, or loose connections. Clean or replace connectors if necessary. Applying dielectric grease to connectors can help prevent future corrosion.
6. Water Damage and Corrosion
Water exposure, especially in boat trailers, can cause corrosion inside wiring and connectors, leading to electrical faults.
Solution: Use marine-grade wire and heat-shrink butt connectors to prevent water intrusion. Apply dielectric grease on connectors to protect them from moisture. Additionally, consider using a junction box to shield electrical connections from direct water exposure.

Step-by-Step Troubleshooting Guide
- Check the Fuse Rating – Ensure the fuse matches the circuit’s amp requirement.
- Inspect Wiring for Damage – Look for exposed, frayed, or pinched wires.
- Test Each Trailer Light – Disconnect lights one by one to isolate a faulty component.
- Examine Ground Connections – Verify all ground points are secure and free of rust.
- Inspect the Trailer Plug and Connector – Clean and replace corroded parts.
- Use a Multimeter – Test for continuity and voltage inconsistencies.
- Upgrade Wiring Where Necessary – If your wiring is too thin, replace it with the correct gauge wire.
Recommended Wire Gauge Chart
| Wire Gauge | Max Amps | Typical Usage |
|---|---|---|
| 18 GA | 10A | Interior trailer lights |
| 16 GA | 13A | Standard trailer lights |
| 14 GA | 18A | Brake lights, moderate loads |
| 12 GA | 25A | Electric brakes, heavy-duty applications |
| 10 GA | 30A | Main power supply, larger accessories |
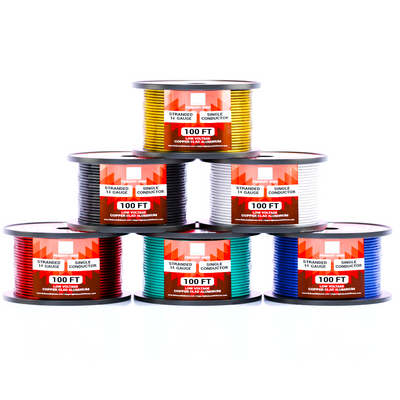
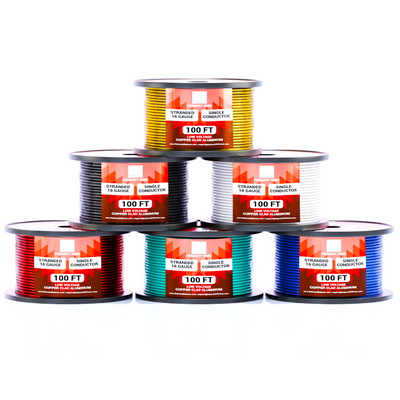
Using the correct gauge wire is essential for preventing overloads that lead to blown fuses. If you need high-quality wiring, consider checking out our set of wiring products, which comes in multiple colors and gauges ranging from 10 to 22 GA for various trailer applications.

Preventive Measures
- Use the Correct Wire Gauge – Prevent overloading circuits by using properly sized wires.
- Apply Protective Coatings – Use dielectric grease and heat-shrink tubing to prevent corrosion.
- Perform Regular Maintenance – Inspect and clean wiring and connectors periodically.
- Avoid Excessive Water Exposure – For boat trailers, ensure all wiring components are waterproof.
- Use Circuit Breakers Instead of Fuses – If your trailer frequently blows fuses, consider installing resettable circuit breakers instead.
Conclusion
Blown fuses in trailer wiring can result from short circuits, overloaded circuits, faulty components, or poor grounding. Regular maintenance, proper wiring practices, and using high-quality components can help prevent these issues. By systematically diagnosing the problem and taking preventive measures, you can ensure a reliable and efficient trailer electrical system.
If you've experienced recurring trailer wiring issues, share your experiences and troubleshooting tips in the comments below! Your input can help fellow trailer owners keep their systems in top shape.